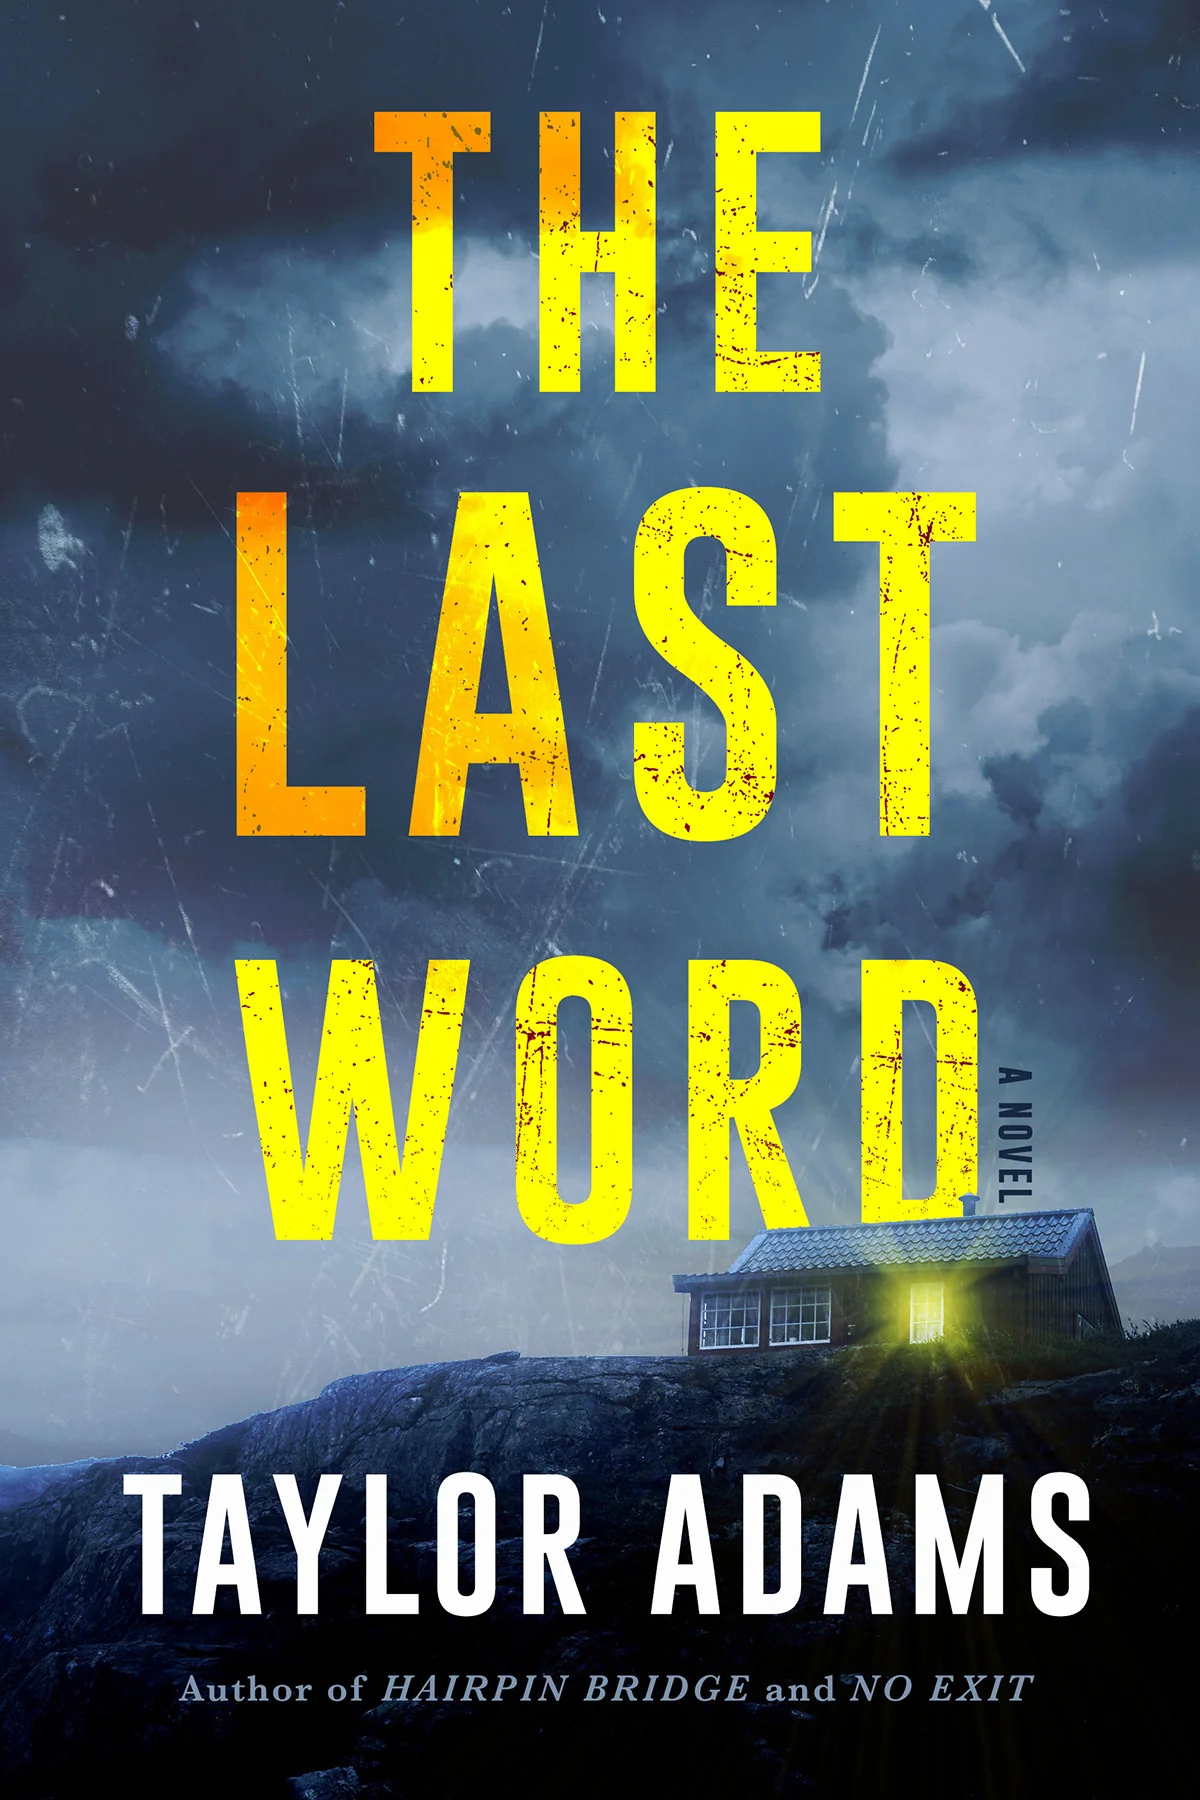
Prologue
Emma Carpenter finishes Murder Mountain, a poorly written horror e-book suggested by her neighbor. While she hesitates over publishing a one-star review, a bird strikes the window and startles her into submitting it. The bird later dies. After walking her golden retriever Laika, Emma receives a message from the book's author, H. G. Kane, demanding that she remove her review. He couches the request in exaggerated politeness, but grows increasingly hostile when she defends readers' right to criticize books. His strange insult about sapsuckers unsettles her in the aftermath of the bird's death. She refuses his last warning and shuts her laptop. The mysterious bedroom visitor does not appear until the following chapter.
Key Events
- Emma reviews Murder Mountain and submits one star as a bird strikes her window.
- The bird dies despite Emma's attempts to help it.
- Author H. G. Kane demands the review's removal, becoming increasingly threatening.
- Emma refuses to delete her review.
Characters Appearing
- Emma Carpenter
- Laika
- H. G. Kane
Themes
- Isolation and vulnerability
- The power and danger of online interactions
- The blurred lines between fiction and reality
Part 1 Chapter 1 Part 1 Chapter 1
After three in the morning, Emma wakes to a figure in a coat and hat watching her in the upstairs bedroom. She turns on the light, but the figure is gone. She searches the entire beach house, including its damp basement, and finds no intruder. Laika startles her in the basement, and she wonders whether she experienced a nightmare. Her isolation continues the next day, punctuated by telescopic whiteboard conversations and Hangman games with Deek, a neighbor a quarter mile away. The house makes unsettling noises, and its neglected bedroom troubles her. Emma remembers a conversation about immortality with Shawn, the husband she has left behind, and feels Deek's observation of her more keenly. On a beach walk she notices another set of footprints. At this point the source has not established Shawn's death.
Key Events
- Emma sees a fedora-wearing figure in her bedroom, but the house search finds no intruder.
- Emma communicates with Deek through whiteboards and telescopes.
- Emma remembers discussing loneliness and immortality with Shawn.
- Another set of beach footprints suggests that someone may be watching her.
Characters Appearing
- Deek
- Jules Phelps
- Shawn Carpenter
Themes
- Paranoia and fear
- The psychological impact of grief and isolation
- The blurring of reality and hallucination
Part 1 Chapter 2 Part 1 Chapter 2
Laika returns from the dunes with bloody gums and a piece of raw flesh. Emma extracts the flesh and cares for the dog, worried that somebody has left dangerous bait nearby. Her whiteboard exchanges with Deek provide companionship, but the distance and his telescope also remind her how exposed she is. Emma weighs whether the figure in her bedroom was imagined. Emma also notices a recurring buttery odor in the house, strongest near the neglected bedroom, but cannot explain its source. A motion light later activates outside as Laika reacts to something in the dark. No culprit is identified.
Key Events
- Laika returns with bloody gums and a suspicious piece of raw meat.
- Emma cleans the injury and wonders how Laika found the meat.
- Emma notices a recurring butter smell, strongest near the neglected bedroom, without understanding its cause.
- Laika reacts to a possible presence and an exterior motion light activates.
Themes
- Isolation and Paranoia
- Trust and Vulnerability
- The Fear of Surveillance
Part 1 Chapter 3 Part 1 Chapter 3
The next morning, Emma, still troubled by the mysterious figure she saw in her bedroom, spreads a thin layer of sand under every door and windowsill to detect any intruders. Rechecking the locks, she finds them secure but remains haunted by the indistinct nature of the figure, attributing it to her recurring nightmares. Determined to gather evidence if the figure returns, Emma's resolve strengthens.
Deek, her neighbor, denies seeing anyone suspicious the previous night. Emma refrains from sharing her concerns, fearing she might sound paranoid. Their conversation during a game of Hangman reveals Deek's medical vocabulary and isolated lifestyle, leading Emma to speculate about his background. Her thoughts drift to her absent husband, Shawn, and their shared hobbies, including his passion for model trains and her interest in astronomy, highlighting the deep connection and the void left by his absence.
A text from Jules, the owner of the house, contains a photo from the doorbell camera showing a strange, masked figure outside the house last night. Jules informs Emma that previous house-sitters reported unsettling incidents, including a human mimicking dog barks and attempts to break in. Realizing the importance of the doorbell camera, Emma formulates a plan to catch the intruder if he returns. Despite Jules's offers of a stun gun, Emma remains focused on her strategy and the need to stay in the house.
Key Events
- Emma spreads sand under doors and windowsills to detect intruders.
- Deek denies seeing anything suspicious, and Emma speculates about his background.
- Emma receives a photo from Jules showing a masked figure outside the house.
- Emma learns about previous unsettling incidents from Jules and formulates a plan to catch the intruder.
Themes
- Isolation and paranoia
- Gathering evidence to confront uncertainty
- The lingering presence of the past
Part 1 Chapter 4 Part 1 Chapter 4
Emma reflects on the masked figure captured by Jules’s doorbell camera, drawing parallels to the killer in 'Murder Mountain,' who wore a mask to avoid detection but didn’t bother when close to his victims. She recalls her one-star review and the escalating threats from H. G. Kane, questioning whether the masked figure is a message from the author. Despite her rational mind telling her it's impossible for an online stranger to find her, Emma feels a growing sense of unease and paranoia.
Delving into H. G. Kane’s author bio, Emma finds it both boastful and bizarre, filled with exaggerated claims and a desperate need for validation. She notices that he has written a long series of similarly titled horror novels, with scattered reviews that Emma suspects include fake accounts. Realizing how easily her personal information can be found online, Emma sends a defiant message to H. G. Kane, reaffirming her intention to keep the one-star review. The chapter highlights her increasing isolation and the tension building as night falls.
Feeling vulnerable, Emma sets up a decoy in her bedroom, arranging pillows to look like a sleeping person, and positions herself in the closet with a knife and her phone, ready to confront the intruder. Despite the caffeine-induced jitters, she finds a strange comfort in the presence of her absent husband, Shawn, in her imagination. The chapter ends with Emma determined to face whatever comes, her resolve strengthened by the memory of Shawn.
Key Events
- Emma draws parallels between the masked figure and the killer in 'Murder Mountain'.
- Emma researches H. G. Kane and finds his author bio and reviews suspicious.
- Emma sends a defiant message to H. G. Kane, reaffirming her one-star review.
- Emma sets up a decoy in her bedroom and prepares to confront the intruder from the closet.
Themes
- Paranoia and Isolation
- Online Threats and Real-Life Consequences
- Memory and Comfort
Part 1 Chapter 5 Part 1 Chapter 5
Emma finds no proof of intrusion in her sand traps, apart from Laika's pawprint. Her loneliness is more serious than her outward routines suggest: a rock-filled green Osprey backpack reflects her contemplation of drowning herself. Researching Deek reveals that he is Deacon Cowl, a formerly celebrated true-crime author who wrote Silent Screams about the Stockyard Slayer. He acknowledges the identity over their whiteboards. Emma asks Jules about the house's entrances, but Jules knows of no secret route. Jules also warns that Deek drinks and lies, advice Emma does not repeat to him. Jules's Christmas greeting reminds Emma how detached she has become from everyday time.
Key Events
- Emma's sand traps reveal no break-in.
- Emma has a rock-filled backpack associated with suicidal thoughts.
- She identifies Deek as true-crime writer Deacon Cowl.
- Jules warns her about Deek and confirms that the house has no hidden entrance.
Themes
- Isolation and Paranoia
- The Blurring of Reality and Paranoia
- The Burden of the Past
Part 1 Chapter 6 Part 1 Chapter 6
Kane emails Emma another angry demand to withdraw her review. She replies by correcting a grammatical mistake, further defying him. Deek offers to keep watch for the stranger. When he asks after her well-being, Emma confronts her severe isolation and suicidal thoughts, including the disturbing notion that the intruder might kill her without requiring her to act. She remembers meeting Shawn after he injured his hand while hiking, and how his promise to meet her after treatment became important to their relationship. Emma considers an in-person conversation with Deek, but his house is already dark. Ultimately she resolves to take Laika to a motel and get away from the house. The full nature of Emma's loss remains concealed.
Key Events
- Kane's threatening email prompts Emma's pointed grammatical correction.
- Deek offers to watch the house while Emma struggles with grief and suicidal thoughts.
- Emma remembers Shawn's injury and his promise to meet her.
- She decides to take Laika to a motel and leave the house.
Themes
- Threat and Intimidation
- Grief and Emotional Numbness
- The Power of Connection
Part 1 Chapter 7 Part 1 Chapter 7
While Emma prepares to leave, a visitor knocks violently and impersonates Deek, claiming a killer has attacked his house. Emma recognizes inconsistencies and refuses to unlock the door. The voice then claims to be the author whose book she criticized, and reads her one-star review aloud while demanding she defend it. She tries to contact 911 and give her address, but the stranger keeps the peephole covered. When Emma calls the novel amateurish, the visitor threatens to turn her into the subject of his next book. He names it Murder Beach and damages Jules's doorbell camera. Emma has not yet independently verified the stranger's real identity.
Key Events
- A visitor claims to be Deek, but Emma refuses to unlock the door.
- The visitor claims to be H. G. Kane and confronts Emma about her one-star review.
- Emma attempts to reach emergency services.
- The visitor names Murder Beach and tears apart the doorbell camera.
Themes
- Paranoia and isolation
- Threat of violence
- Manipulative confrontation
Part 2 Chapter 8 Part 2 Chapter 8
An excerpt labeled as a draft of Murder Beach recounts the purported author's arrival at Strand Beach, a purchase of fishhooks, his childhood story Propeller Head, and his surveillance of Emma. The embedded narration's claims about his abilities and plans are not independent testimony. Meanwhile Emma suspects that earlier bait contained hooks meant to injure Laika. Her emergency calls fail, and her phone and other devices lose internet access. Preparing to drive away, she finds that Laika has escaped through damaged fencing. She searches the dunes and catches the dog eating raw chicken with red rodent-poison pellets. Emma removes the meat she can see but cannot tell whether Laika swallowed more.
Key Events
- The embedded Murder Beach draft describes preparations and fishhooks.
- Emma's communications fail.
- Laika escapes the yard while Emma prepares to flee.
- Emma finds poison-laced chicken in Laika's mouth, but her actual dose remains unknown.
Themes
- Meticulous Planning and Deception
- Revenge and Obsession
- Survival and Protection
Part 2 Chapter 9 Part 2 Chapter 9
Emma takes Laika to the Corolla, but the engine will not start. An inserted account says the attacker had cut the battery cables. Emma remembers an unplugged landline in Jules's house and risks a short run back inside with Laika. The landline fails too, with the attacker having cut local telephone cables. Without a car or working communications, she looks toward Deek's house for help, lights a cigarette, and arms herself with a kitchen knife. She understands the danger but decides she will not be the passive victim her attacker expects; her prior despair has complicated her fear of dying.
Key Events
- The Corolla has been disabled, so Emma retreats inside with Laika.
- The landline is dead and the attacker's account describes severed cables.
- Emma looks to Deek for help and arms herself.
- She resolves to fight despite believing escape may be impossible.
Themes
- Isolation and vulnerability
- Desperation and survival
- Psychological manipulation and fear
Part 2 Chapter 10 Part 2 Chapter 10
Emma remembers a bird striking a window during an earlier conversation with Shawn about having children. Kane's insult about sapsuckers raises the possibility of surveillance. Using Jules's Polaroid camera and flash, Emma searches the yard and photographs a crouching man beyond the motion sensors. She defiantly writes AMATEUR on the glass, although an embedded version of Murder Beach falsely claims she begged the man not to kill her. Retreating upstairs with Laika, she watches the attacker disable each exterior light. The photograph develops, revealing a pale fedora-wearing man and a long swordlike object. Then Laika vomits another piece of poisoned chicken. Emma realizes she may have swallowed a fatal dose and resolves to find hydrogen peroxide to induce vomiting.
Key Events
- Emma uses Polaroid flashes to photograph the man outside.
- Her written AMATEUR contradicts the embedded narrator's account of a plea for mercy.
- The photo reveals a pale figure carrying an unusual weapon.
- Laika vomits poisoned chicken, requiring urgent treatment.
Themes
- Isolation and Paranoia
- The Intrusion of Past Trauma
- Desperation and Survival
Part 2 Chapter 11 Part 2 Chapter 11
Emma descends to the kitchen in darkness to find hydrogen peroxide for Laika. She avoids switching on a light that might reveal her position, but accidentally kicks the dog's metal food bowl. She remembers the strange swordlike object in her Polaroid resembling the curved weapons depicted on an old poster. Searching under the sink, she discovers that the peroxide bottle she stored there after cleaning Laika's gums is missing. Before she can find an alternative, the living-room window shatters and the intruder enters.
Key Events
- Emma searches the kitchen for an emetic while Laika waits upstairs.
- She makes noise by accidentally kicking a food bowl.
- She recognizes a resemblance between the pictured weapon and a poster's sword.
- The peroxide is missing when the intruder shatters the window.
Themes
- Isolation and Paranoia
- Desperation and Survival
- Uncanny Coincidences
Part 2 Chapter 12 Part 2 Chapter 12
The intruder drives a katana through a reinforced window and climbs inside. Emma crouches behind the kitchen island while he searches the room, knocking objects from the counters. The accompanying account exaggerates his nearly supernatural awareness, an unreliable claim rather than an established ability. Emma escapes his sword strike by circling the island, then races upstairs. She topples a heavy armoire against the bedroom door and force-feeds Laika salt in an effort to make her vomit. The attacker pounds on the barricade but fails to get in and eventually becomes quiet. Emma cannot tell where he has gone or whether Laika is safe.
Key Events
- The intruder smashes a reinforced window with a katana.
- Emma hides beside the kitchen island and escapes upstairs.
- She barricades the bedroom door and gives Laika salt to induce vomiting.
- The attacker falls silent outside the barricade without being located.
Themes
- Isolation and Paranoia
- Survival and Instinct
- The Persistence of Fear
Part 2 Chapter 13 Part 2 Chapter 13
Emma takes Laika into the bathtub and remembers Shawn encouraging her to trust her abilities while they built a model railroad. Headlights then approach the house, and a man calls out that he is police. Emma believes Deek must have summoned help. She listens as the apparent officer orders a man to surrender and hears what sounds like compliance. Relieved, she begins to think that her ordeal is over. Laika finally vomits after taking the salt, and Emma imagines a future meeting with Deek, expressing renewed interest in living. She taunts the apparently captured man from her bathroom. All of this is Emma's interpretation of sounds outside, however, not a confirmed police arrival or arrest. The following chapter reveals that the voice was an impersonation.
Key Events
- Emma hides with Laika in a bathtub and remembers Shawn.
- Headlights and apparent police commands convince her the attacker has been arrested.
- Laika vomits and Emma briefly believes they have survived.
- The supposed arrest is her mistaken interpretation, not an established event.
Themes
- Memory as a Source of Strength
- The Fragility of Safety
- Renewed Hope and Determination
Part 2 Chapter 14 Part 2 Chapter 14
The apparent police arrival is revealed to be the attacker impersonating an officer and subduing Jake Stanford, a FedEx driver who has unexpectedly arrived at the beach house. Emma goes to the front door and finds Jake held at swordpoint. She offers herself in exchange for his release. The attacker displays a pistol and taunts her with personal details learned by observing her. He also claims someone else told him to kill her, although he says he wanted to spare her. Emma wonders if the earlier demon-masked figure was a different person. The man seemingly agrees to release Jake, but the driver tries to strike him with a rock. The killer slices off his hand and inflicts fatal injuries with the katana. Emma retreats inside, horrified at the killing.
Key Events
- The supposed police officer is exposed as an impostor who captured FedEx driver Jake Stanford.
- Emma attempts to bargain for Jake's freedom and hears the killer mention an unnamed second person.
- Jake attempts to hit the attacker with a rock.
- The attacker fatally mutilates Jake with his sword.
Characters Appearing
- Jake Stanford
Themes
- Isolation and Paranoia
- Violence and Control
- The Threat of Unseen Enemies
Part 2 Chapter 15 Part 2 Chapter 15
Emma is traumatized by Jake's murder and hears the attacker rage outside. An interwoven narrative recounts Howard Grosvenor Kline's teenage fixation on Laura Birch, a disturbing unpublished novel, her disappearance, and hidden trophies connected to her death. These facts do not prove that the murders depicted in his sixteen published novels actually happened. Emma uses her telescope to signal Deek, but his telephone is also cut. He advises her to flee. Emma refuses, realizing she would be exposed to gunfire in the dunes and unwilling to abandon Laika. Deek reports that his old revolver has no bullets. Since the killer said somebody ordered him to kill her, Emma considers an accomplice and briefly wonders whether Deek himself can be trusted.
Key Events
- Emma fears further violence after Jake's death.
- The narrative reveals Howard's history with missing classmate Laura Birch.
- Deek cannot reach police because his line is cut.
- Emma rejects escape without Laika and considers an accomplice.
Themes
- The psychological impact of witnessing real violence compared to fictional violence
- The psychological toll of trauma and isolation
- The search for trust and allies in a dangerous situation
Part 2 Chapter 16 Part 2 Chapter 16
Emma and Deek track Howard around the house through telescopes and whiteboards. Emma suggests that Deek escape toward a vacant cabin to use a telephone, but the attacker's sabotage and exposed ground defeat the plan. Deek urges them to fight. Emma retrieves a hammer and screwdriver, then starts heating water as a weapon. Howard searches Jake's FedEx van and overlooks a parcel containing the stun gun Jules ordered for Emma; he moves the van behind the garage. Deek then insists he should come over to reason with the attacker, whom he recognizes as a former admirer. Emma warns him to stay home. He confesses that his recommendation of Murder Mountain was a joke, and finally writes the writer's real name: Howard Grosvenor Kline.
Key Events
- Emma and Deek monitor Howard by whiteboard and telescope.
- Emma's proposed escape routes for Deek prove unsafe.
- Emma gathers weapons while Howard overlooks the delivered stun gun.
- Deek identifies Howard Grosvenor Kline and insists on intervening.
Themes
- Isolation and vulnerability
- The intersection of past actions and present danger
- The psychological impact of past mockery
Part 2 Chapter 17 Part 2 Chapter 17
Deek recounts his first encounter with Howard Grosvenor Kline, detailing how Kline stalked him and his daughters years ago, breaking into his home and waiting for the family to return. Kline’s obsessive behavior and his history of sending unsolicited manuscripts to Deek underscore his dangerous and unstable nature. Emma, watching through a telescope, feels a growing sense of dread as the storm intensifies and the threat of Kline’s presence looms closer.
Deek’s frantic search for Kline proves fruitless, and Emma’s frustration mounts as she realizes Deek has lost sight of the intruder. She takes stock of the house’s defenses, ensuring Laika is safe upstairs and the doors and windows are barricaded. Her anxiety spikes when she spots Kline standing behind Deek, who remains oblivious to the danger. Emma desperately tries to warn Deek without alerting Kline, writing urgent messages on a whiteboard.
Understanding the gravity of the situation, Deek makes a bold decision to confront Kline. Despite Emma’s frantic warnings to run, Deek stands up with a letter opener, preparing to face the intruder. The chapter ends with Emma’s desperate plea, “No,” as Deek turns to face Kline, setting the stage for a potentially deadly confrontation.
Key Events
- Deek recounts his history with Howard Grosvenor Kline, including Kline's stalking and home invasion.
- Emma watches Kline appear behind Deek, unnoticed by the old man.
- Emma desperately tries to warn Deek of Kline's presence using a whiteboard.
- Deek, despite Emma's warnings, stands up to confront Kline with a letter opener.
Themes
- Obsession and Stalking
- Isolation and Paranoia
- Desperate Measures and Confrontation
Part 2 Chapter 18 Part 2 Chapter 18
Deek turns on his living-room light, revealing that the sinister silhouette Emma thought was behind him is only a coat and black hat on a hook. As he searches his rooms, Emma feels ashamed for having panicked at a shadow. Then a nearby draft and the smell of Mtn Dew, sweat, and butter alert her to a presence in her own room. Howard suddenly grabs her hair and pulls her head back, raising his katana toward her throat. The decoy silhouette has distracted Emma from the actual intruder behind her.
Key Events
- Light reveals that the figure behind Deek was a hanging coat and hat.
- Emma detects the characteristic smell of the attacker in her room.
- Howard seizes Emma from behind and threatens her with his sword.
Themes
- Paranoia and Misinterpretation
- Imminent Danger
- Isolation and Vulnerability
Part 2 Chapter 19 Part 2 Chapter 19
Emma tears herself from Howard's grasp, losing hair in the struggle. Deek fires fireworks, distracting the killer and illuminating the house. Emma draws Howard into the basement deliberately: she knows where he will reach for the light switch and where his long katana will be difficult to use. She smashes his hand with a claw hammer; his sword lodges in a structural post beside her. The intruder's narrative downplays the injury, but Emma gains time to escape upstairs. There she positions herself around a blind corner with a screwdriver as Howard approaches with a pistol. Emma attacks the figure who rounds the corner, believing she has stabbed Howard. The chapter does not yet establish the victim's identity.
Key Events
- Deek's fireworks distract Howard and let Emma escape.
- Emma injures Howard's hand at the basement light switch.
- She prepares an upstairs screwdriver ambush.
- Emma strikes a figure she believes is Howard, before the victim is identified.
Themes
- Survival and resilience
- Revenge and justice
- The power of memory and past relationships
Part 2 Chapter 20 Part 2 Chapter 20
Emma's screwdriver pierces the approaching man's throat, and his gun tumbles to the floor. A final white firework lights the wounded man's face. He says Emma's name, and she suddenly recognizes Deek, not Howard. Emma whispers his name in horror. The extremely short chapter ends at the mistaken-identity revelation and does not establish his death or contain further conversation.
Key Events
- Emma stabs an approaching man and knocks his gun away.
- A firework reveals she has struck Deek rather than Howard.
- The chapter ends as Emma recognizes her wounded friend.
Themes
- Survival Instincts
- Moral Ambiguity
- Trauma and Confusion
Part 3 Chapter 21 Part 3 Chapter 21
Emma remembers driving with Shawn toward Denver and checking work email while a large truck moved into their lane. Shawn warned her to look up; the full result of the accident is not yet disclosed. In the present, she realizes she has mistakenly stabbed Deek. She tries to staunch his neck wound with her clothing, pressure, and clear tape. Deek gestures desperately toward something in the room, but she misunderstands him. Overwhelmed by guilt, she refuses to abandon him. Howard returns from the basement while Emma and Deek are still on the floor, leaving her exposed. The chapter does not confirm Deek's death or that Shawn died in the remembered collision.
Key Events
- A flashback shows Emma distracted by a phone shortly before a highway collision.
- Emma tries to control Deek's bleeding after stabbing him by mistake.
- Deek gestures urgently toward an object across the room.
- Howard returns while Emma remains beside the wounded neighbor.
Themes
- Guilt and Remorse
- Mistaken Identity
- Self-Destruction
Part 3 Chapter 22 Part 3 Chapter 22
Two genuine Strand Beach officers, Corporal Eric Grayson and Officer Greg Hall, arrive at Emma's address for a welfare check. Howard presses his pistol against Emma's head while the badly injured Deek remains on the floor. The police knock and call out from the porch. Emma cannot answer without risking a shot; Howard cannot shoot without alerting the officers. The stalemate remains dangerous for everyone. Howard finally orders Emma to open the door, falsely assure police that she is alone, and send them away. He threatens to finish Deek if Emma disobeys.
Key Events
- Corporal Grayson and Officer Hall arrive for a welfare check.
- Howard holds Emma at gunpoint while Deek lies injured.
- Emma cannot call for help without exposing Deek to retaliation.
- Howard orders her to deceive the officers and threatens Deek.
Characters Appearing
- Corporal Eric Grayson
- Officer Greg Hall
Themes
- Control and manipulation
- Tension and suspense
- Moral dilemmas
Part 3 Chapter 23 Part 3 Chapter 23
Emma opens the front door halfway and answers the officers' questions while Howard listens from inside with Deek as a hostage. The officers become suspicious of her evasions. Emma hears the water boiling in the kitchen and realizes Deek had been trying to tell her about a gun, not urging her to run. He brought a weapon to the house. She also wonders who called the officers, since Deek could not use his telephone. Then another car arrives: Jules Phelps, owner of the beach house, walks up to the porch. The officers explain that Jules requested the welfare check.
Key Events
- Emma lies to the officers to avoid provoking Howard.
- She realizes Deek was indicating his gun rather than telling her to run.
- Emma questions who summoned police.
- Jules arrives and is identified as the welfare-check caller.
Themes
- Deception and Trust
- Isolation and Vulnerability
- Survival Instincts
Part 3 Chapter 24 Part 3 Chapter 24
Jules adds unpredictable questions about the internet, motion lights, and an electric stun gun she bought Emma. She recalls a demon-masked prowler terrifying her family at this property the previous winter, before Emma's review, raising doubts about the threat's origin. Howard hides behind a curtain close to Officer Hall, making any whispered warning dangerous. Emma speaks instead about her isolation after a traffic accident and a terrible loss five months earlier, without identifying the deceased. Corporal Grayson offers sympathy and advice. As Jules and the officers leave, Emma silently mouths Howard Grosvenor Kline's name to Jules and signals that he is armed and holding a hostage. Jules appears to understand, but Emma cannot verify she will alert police.
Key Events
- Jules describes a masked prowler who visited before Emma reviewed Howard's book.
- Howard watches the officers from behind a curtain.
- Emma speaks cautiously about her grief without revealing the full loss.
- She covertly warns Jules that Howard is inside, armed, and holding a hostage.
Themes
- Strategic Vulnerability
- Tension and Unpredictability
- Hope and Desperation
Part 3 Chapter 25 Part 3 Chapter 25
After the visitors depart, Howard gives contradictory explanations of his intentions. He weeps over Jake's death while the embedded account says he planned substantial violence. He tells Emma his sixteen published horror books were fictional and that Murder Beach is not a real book he has been writing. He makes a disturbing, self-serving admission about Laura Birch, whom he restrained and left to suffocate, while denying that he technically murdered her. Emma distrusts his claims. Howard says he became interested in Emma before she reviewed his novel and offers to spare her if she leaves with him as his captive partner. Then Deek, seriously injured but alive, appears with a revolver apparently aimed at Emma. His intention remains concealed until the following chapter.
Key Events
- Howard says the earlier novels are fiction, contradicting Emma's assumptions.
- He describes Laura Birch's death in an evasive attempt to excuse himself.
- He proposes abducting Emma as his companion.
- Deek appears alive with a gun aimed in Emma's direction.
Themes
- Identity and Deception
- Moral Ambiguity
- Psychological Manipulation
Part 3 Chapter 26 Part 3 Chapter 26
The remembered truck crash was relatively minor, and Shawn survived physically unharmed. In the beach house, Deek orders Emma to duck, showing that he is actually aiming past her at Howard. He disarms the attacker and forces him to kneel. Emma picks up Howard's unusually light pistol, believing she now has him covered. Deek is badly weakened by his injury. Howard threatens to subject him to a ritualized death, but Deek continues to hold him at gunpoint. Then someone enters. Emma hopes the police have returned, but Jules appears. Seeing Howard, she calls him Howie. He replies Mom, revealing that Jules is Howard's mother. The identity of the person Emma lost in the car crash has not yet been revealed.
Key Events
- A flashback confirms Shawn survived the truck collision.
- Deek aims past Emma and forces Howard to surrender his weapons.
- Emma retrieves Howard's apparently loaded pistol.
- Jules arrives and identifies Howard as her son.
Themes
- Trauma and Memory
- Manipulation and Control
- Family Secrets and Betrayal
Part 3 Chapter 27 Part 3 Chapter 27
Jules explains that Howard formerly lived in her house and kept access to it, accounting for his knowledge of the property and his ability to stalk Emma. Emma checks his unusually light pistol and learns it is a pellet gun, not a firearm. Deek's revolver remains their only effective gun. Deek discusses the disappearance of Howard's classmate Laura Birch and his own remorse about having influenced the aspiring writer. Jules refuses to leave her son alone with Deek. Deek gives Emma keys to drive out for police, while Jules stays as a witness. Emma nudges Howard's katana across the floor toward Deek for protection; he does not hand the sword to her. Howard claims Emma lied about what happened to Shawn and suddenly lunges at her.
Key Events
- Jules reveals Howard grew up in the house and retained a key.
- Emma discovers the apparent pistol is a pellet gun.
- Deek tells Emma to take the car for help while Jules stays behind.
- Howard accuses Emma of lying about Shawn and lunges.
Themes
- Trust and Betrayal
- Revelation of Dark Secrets
- Family Loyalty and Conflict
Part 3 Chapter 28 Part 3 Chapter 28
As Howard lunges at Emma, Deek aims at his chest and fires. Jules grabs Deek's wrist to stop him from shooting her son. The shot strikes the ceiling instead. This extremely brief chapter contains only the diverted shot, not a subsequent plea, argument, or accusation.
Key Events
- Deek fires at Howard as he attacks Emma.
- Jules grabs Deek's wrist, diverting the bullet into the ceiling.
Themes
- Escalating Tension and Violence
- Moral Dilemmas and Compassion
- Unveiling Hidden Truths
Part 3 Chapter 29 Part 3 Chapter 29
Howard tackles Emma and chokes her while insulting her one-star review. Deek fires another shot during a struggle with Jules, giving Emma a moment to flee. She barricades herself in the laundry room and hears a violent blow cut off Deek's words, leading her to believe he has been killed. Emma climbs the narrow laundry chute toward the upstairs bedroom. Howard takes Deek's revolver, binds his mother with rope, and discovers Emma's route. He drives his katana through a wall, cutting Emma's cheek. Trying to force the curved blade back through the wall causes the sword to shatter. Emma keeps climbing while Howard despairs over his broken weapon. Deek's ultimate fate is not yet established.
Key Events
- Howard chokes Emma; Deek fires again and she escapes.
- Emma believes Deek has been killed and enters the laundry chute.
- Howard ties up Jules, acquires the gun, and injures Emma through the chute wall.
- Howard's katana breaks against the wall, rather than being shattered deliberately.
Themes
- Survival Instincts
- Moral Ambiguity
- Desperation and Resilience
Part 3 Chapter 30 Part 3 Chapter 30
Emma reaches Laika in the upstairs bedroom, breaks open a window with a nightstand, and carries the retriever onto the steep roof. She jumps into hedges below as Howard breaks through the barricade. Gunfire frightens Laika into fleeing, leaving Emma desperately calling for her in the storm. Emma then starts Jules's Lincoln, but it is a decoy: Howard fires at the driver's window and discovers the car empty. Emma has taken Jake Stanford's FedEx van from behind the garage. She drives it into Howard, knocking him onto the wet driveway, then flees while he recovers his gun. Her apparent escape is incomplete because Laika has disappeared.
Key Events
- Emma escapes across the roof with Laika and jumps into the hedges.
- Laika flees in panic during Howard's gunfire.
- Emma uses Jules's Lincoln as a decoy, drawing Howard's shot.
- Emma drives Jake's van into Howard and leaves, with Laika still missing.
Themes
- Survival and resilience
- The unpredictability of violence
- Quick thinking under pressure
Part 4 Chapter 31 Part 4 Chapter 31
A 2021 epigraph introducing Part Four quotes Howard praising Deacon Cowl as a personal mentor who encouraged his writing and let him handle a revolver. This first-person account complicates Deek's earlier description of their relationship. In the chapter proper, Howard lies injured in the driveway, initially trying to rationalize Emma's escape as an acceptable ending to his intended horror story. He returns to the house and finds his mother, Jules, dead. The autopsy later attributes her death to positional asphyxia from the restraints Howard tied too tightly; Laura Birch died the same way when he left her restrained as a teenager. Howard recognizes that he has killed three people through cruelty and incompetence, even though Emma escaped. Resentful that she survived without sufficient cost, he sees Laika returning to the house, coaxes the dog close, and raises the broken fragment of his katana toward her throat. This chapter stops before he harms her.
Key Events
- Part Four opens with Howard's prior praise for Deek as an influential mentor.
- Howard returns after Emma's escape and discovers Jules dead from positional asphyxia.
- He connects Jules's death to the way Laura Birch died while restrained.
- Howard lures Laika close and prepares to kill her as revenge.
Themes
- Unreliable narratives
- Consequences of violence
- Retaliation
Part 4 Chapter 32 Part 4 Chapter 32
Emma returns to the house, rather than escaping permanently, because she deliberately took Jake Stanford's FedEx van to retrieve the undelivered stun gun Jules had ordered. She stops Howard as he is about to attack Laika by applying the stun gun to his face. Laika escapes unharmed. Howard manages to shoot Emma in the thigh with Deek's revolver, leaving her badly injured. He appears to have a final cartridge and raises the gun again. Emma strikes his face with the aluminum pan she previously filled with water; the water has cooled, but the metal pan breaks his nose. Bleeding and nearly unable to stand, she crawls into Howard's old bedroom. She abandons her imagined conversations with Shawn as imagined, then remembers Howard said he concealed evidence and a weapon behind a board over his bed. Emma finds Laura Birch's trophies and a wakizashi sword. When Howard kicks open the door, Laika bites his gun arm, creating the opening Emma needs to stab him through the chest. His death is not yet confirmed.
Key Events
- Emma returns for Jules's delivered stun gun and saves Laika from Howard.
- Howard shoots Emma in the thigh; she strikes back with the heavy metal pan.
- Emma finds Laura Birch's trophies and a hidden wakizashi in Howard's bedroom.
- Laika attacks Howard's gun arm, enabling Emma to stab him in the chest.
Themes
- Survival Instinct
- Resilience in Adversity
- Desperation and Despair
Part 4 Chapter 33 Part 4 Chapter 33
Bleeding from the gunshot, Emma takes Howard's phone and places an emergency call using its emergency-dial function. She reports that Jake, Jules, and Deek may be dead and says she killed Howard. Although she believes he is dead, movement from the bedroom interrupts the call. Howard staggers into the living room with the wakizashi still embedded in his chest. Emma has already recovered Deek's Smith & Wesson revolver. Before Howard can reach her, she shoots him in the head. She then tells the dispatcher that she is now sure he is dead. The chapter explicitly establishes Howard's final death, but Emma still believes Deek is dead because she did not witness his recovery.
Key Events
- Emma calls 911 from Howard's phone and reports the shooting and apparent deaths.
- A severely injured Howard unexpectedly emerges from the bedroom alive.
- Emma shoots Howard in the face with Deek's revolver.
- Emma tells the dispatcher she is finally certain Howard is dead.
Themes
- Survival and resilience
- The consequences of violence
- The impact of past experiences on present actions
Part 4 Chapter 34 Part 4 Chapter 34
Emma awakens in hospital after surviving her thigh wound and blood loss. Corporal Eric Grayson updates her on the inquiry. Investigators conclude Howard became obsessed with finding and punishing an online reviewer who happened to be staying in his former home. They attribute his violence partly to his fixation on the review, while Emma cannot reconcile that simple account with his claims that someone directed him to murder her. The possibility of an unseen accomplice remains unproven. During recovery Emma withdraws, but she eventually returns to the beach house with Laika, briefly rediscovers happiness on the shore, and resolves to leave the Strand for Utah the next day. She and Deek share the long-promised ginger tea. Deek is alive: he survived a skull fracture and concussion despite Emma's mistaken stabbing and Howard's apparent final blow. He says he plans to reconnect with his estranged adult twin daughters and is drafting a book about the attack. Emma agrees to talk to him for the book. Her telephone rings with Shawn's number. The chapter ends before the true circumstances of their separation are fully disclosed.
Key Events
- Emma survives hospitalization but questions the official account of Howard's attack.
- She returns to the house, enjoys Laika's recovery, and decides to leave for Utah.
- Deek is revealed alive, recovering from his injuries, and working on a new book.
- They finally share ginger tea as Emma receives a call from Shawn's number.
Themes
- Trauma and Recovery
- The Complexity of Grief
- Redemption and Moving Forward
Part 4 Chapter 35 Part 4 Chapter 35
The narration reveals that Emma's husband Shawn is alive in Salt Lake City. They remain married but have been estranged since Emma fled their home after a tragedy. Their four-month-old daughter, Shelby, died in a minor traffic collision when Emma glanced at an email while driving. Both adults survived. This is the loss Emma has repeatedly described in ways that encouraged assumptions about Shawn's death. As Emma reaches for Shawn's call, Deek raises a revolver and orders her not to answer. He implies Howard was supposed to kill her and that Emma's admission of suspecting his involvement made her too dangerous to leave alive. Emma reconstructs the improbable chain linking herself, Howard, and his former home: it was Deek who recommended Murder Mountain. She has not simply fallen into a series of coincidences. Deek thinks he has trapped her, but Emma has concealed Jules's stun gun beneath the table. She shocks him in the groin, momentarily gaining control.
Key Events
- The true loss is revealed: Shawn survived, but their infant daughter Shelby died in Emma's car crash.
- Deek threatens Emma with a revolver and reveals his apparent complicity.
- Emma realizes Deek deliberately introduced her to Howard's book.
- Emma shocks Deek with a concealed stun gun.
Characters Appearing
- Shelby Carpenter
Themes
- Concealed Trauma and Guilt
- Betrayal and Manipulation
- Survival and Resourcefulness
Part 4 Chapter 36 Part 4 Chapter 36
Deek collapses after Emma shocks him. She takes his revolver and confronts him with her reconstruction: he exploited an isolated woman, encouraged the aspiring killer he had mentored to attack her, and intended to intervene dramatically so that his account of the massacre would revive his writing career. Emma describes the scheme as an inference based on his behavior; Deek does not confirm every detail aloud. She reveals that her audio recorder has been collecting his words. Searching his pockets, she finds zip ties, tape, gloves, and a bottle labeled with propofol, a drug associated with the Stockyard Slayer. This seems to confirm his preparations to incapacitate her. Deek finally breaks his silence and states that he has already poisoned her. The chapter ends with that revelation, before Emma identifies the delivery method.
Key Events
- Emma disarms the incapacitated Deek and confronts him about his alleged murder-for-a-book scheme.
- She points to an audio recorder that may corroborate their exchange.
- Emma finds restraint supplies and a bottle containing propofol.
- Deek says he has already poisoned her, leaving the means and consequences to the next chapter.
Themes
- Manipulation and Control
- Revenge and Vengeance
- Truth and Deception
Part 4 Chapter 37 Part 4 Chapter 37
Emma realizes Deek had contaminated her ginger tea in advance, likely during her hospitalization, though the precise moment of dosing is never established. Her body becomes sluggish as the drug takes effect. Deek tells her he encouraged Howard to pursue her, then deliberately recommended Murder Mountain when Howard began losing interest in killing Emma. He intends to arrange a suicide, write a self-serving account of the massacre, and portray her death as the result of grief. Emma attempts to stun him again and, after he seizes the device, to fire his revolver, but it is unloaded. Deek stages the room, begins fabricating a suicide note on her laptop, and describes taking care of Laika. With her remaining strength Emma uses a knife to carve DEEK KILLED ME into her forearm, leaving physical evidence he has not anticipated. Shawn's voicemail plays as the chapter ends, telling her that their daughter's death was not her fault and asking her to come home. Her death is not yet confirmed.
Key Events
- Emma realizes Deek poisoned her tea, although exactly when he dosed it is unverified.
- Deek explains how he manipulated Howard and plans to frame Emma's murder as suicide.
- His revolver proves unloaded, and he begins staging the scene.
- Emma carves DEEK KILLED ME into her arm; Shawn's voicemail urges her to return.
Themes
- Manipulation and Betrayal
- Desperation and Resilience
- Isolation and Despair
Part 4 Chapter 38 Part 4 Chapter 38
Emma drifts in and out of consciousness as Deek drives her toward the seawall. She imagines a car filled with the dead, including Howard, Jules, and Jake. Howard's presence and speech are part of her drug-induced experience, not proof that he survived the earlier shooting. Deek carries Emma to a rocky jetty and straps a backpack weighted with stones onto her. He takes care to leave her locket and other belongings so her death will appear self-inflicted. He admits abusing his former wife and having no intention of reconnecting with his daughters. Emma shows him the message carved into her arm; he dismisses it, believing the sea will erase the evidence. He pushes her into the ocean. Underwater she struggles to unbuckle the backpack but cannot immediately free the last strap. The narrative then shifts into Deek's manuscript, which presents her death as suicide and depicts him as a sympathetic friend. Those claims are deliberately false and do not establish her final fate.
Key Events
- Emma experiences a drug-induced vision of Howard and other dead people during Deek's drive.
- Deek prepares an apparent drowning suicide and pushes Emma into the ocean.
- Emma struggles with a weighted backpack while Deek expects her to die.
- Deek's self-serving book manuscript asserts she took her own life, an assertion later disproved.
Themes
- The Cycle of Violence and Abuse
- Desperation and Survival Instincts
- The Weight of Guilt and Consequences
Part 4 Interstitial 1 Part 4 Interstitial 1
This interstitial is the acknowledgments and dedication for Deacon Cowl's purported manuscript Murder Beach, not an independently reliable authorial statement about what happened. Deek thanks the Strand Beach police, editors, an agent, and supporters of his planned book. He expresses remorse about Laura Birch and claims credit for the narrative, even as the preceding chapter has shown him attempting to kill Emma and falsify her death. He announces planned donations to victims' families and advocacy organizations and dedicates the book to Howard's victims, including Emma Carpenter. The mention of Emma among the dead deliberately extends his false account and should not be presented as proof of her death.
Key Events
- Deek's embedded manuscript offers acknowledgments to investigators and publishing collaborators.
- He claims regret and offers donations to victims' families and charities.
- He dedicates Murder Beach to Emma as though she had died.
- The entire interstitial is part of Deek's self-serving, unreliable narrative.
Themes
- Acknowledgment of Supportive Institutions
- Grief and Reflection
- Unexpected Evil
Part 4 Interstitial 2 Part 4 Interstitial 2
A transcript records Deek telephoning Strand Beach police on a nonemergency line the morning after he pushed Emma into the sea. He requests a welfare check and offers a carefully prepared story of a depressed neighbor who had collected rocks in a backpack and might have drowned herself. A dispatcher interrupts him to say Emma has already walked into the police station without shoes, a wallet, or a phone. The officer confirms that she is alive and safe. Deek's surprised response is disbelief, not relief: he says no and abruptly disconnects. The transcript exposes the failure of his attempted murder and fabricated suicide scenario.
Key Events
- Deek calls police to construct a record of concern over Emma's supposed suicide.
- He points to her depression and rock-filled backpack as supporting details.
- The dispatcher reveals Emma is alive and present at the station.
- Deek reacts with disbelief and ends the call abruptly.
Themes
- Deep Concern and Guilt
- Mental Health and Trauma
- Relief Tinged with Unease
Part 4 Chapter 39 Part 4 Chapter 39
Emma arrives at Strand Beach police headquarters barefoot and injured after walking eleven miles from the shore. She describes her memories of Deek's attempted drowning cautiously, but the narrative reveals her actual underwater struggle. While drugged and sinking, she imagined holding her daughter Shelby alive after the highway collision. She tells the child that she will see her again, but not yet. That decision gives Emma the strength to release the last jammed strap of the weighted backpack. Freed from the rocks, she rises to the ocean's surface under the stars. The chapter confirms that the drowning and Deek's claimed suicide were not her final fate.
Key Events
- Emma reaches the police station alive after walking eleven miles.
- She remembers imagining her deceased daughter Shelby while sinking underwater.
- Emma decides not yet and frees the final strap of the weighted backpack.
- She returns to the surface, defeating Deek's attempted murder.
Themes
- Memory and Grief
- Maternal Love and Determination
- Survival and Renewal
Epilogue
Emma drives away from Strand Beach with Laika and heads back toward Salt Lake City. She remembers saying goodbye to Corporal Eric Grayson, visiting Jake Stanford's parents, and buying a copy of Deek's earlier book Silent Screams. Deek has been found dead in his recliner, his honorary revolver still in his mouth and a completed hanging figure on his Hangman whiteboard, strongly indicating suicide. The warning carved into Emma's forearm remains evidence of his attack. At a mountain-pass visitor center, Emma calls her estranged husband Shawn. She apologizes for disappearing after Shelby's death and tells him that she and Laika are safe and coming home. Shawn is initially silent, leaving Emma uncertain whether reconciliation is possible. He then calculates a midpoint between their locations and proposes meeting her in Brighton, Idaho. She accepts, and they reaffirm their love. His closing promise to meet her there recalls their earlier relationship and confirms the novel ends with Emma alive and seeking reconnection, not dead by suicide.
Key Events
- Emma leaves Strand Beach with Laika and remembers visits to Eric and Jake's family.
- Police found Deek dead with his revolver in his mouth, strongly indicating suicide.
- Emma calls Shawn and apologizes for withdrawing after Shelby's death.
- Shawn proposes meeting halfway in Brighton, and Emma agrees.
Themes
- The power of memory and love in overcoming trauma
- Reconciliation and the journey toward healing
- Hope and determination in the face of adversity